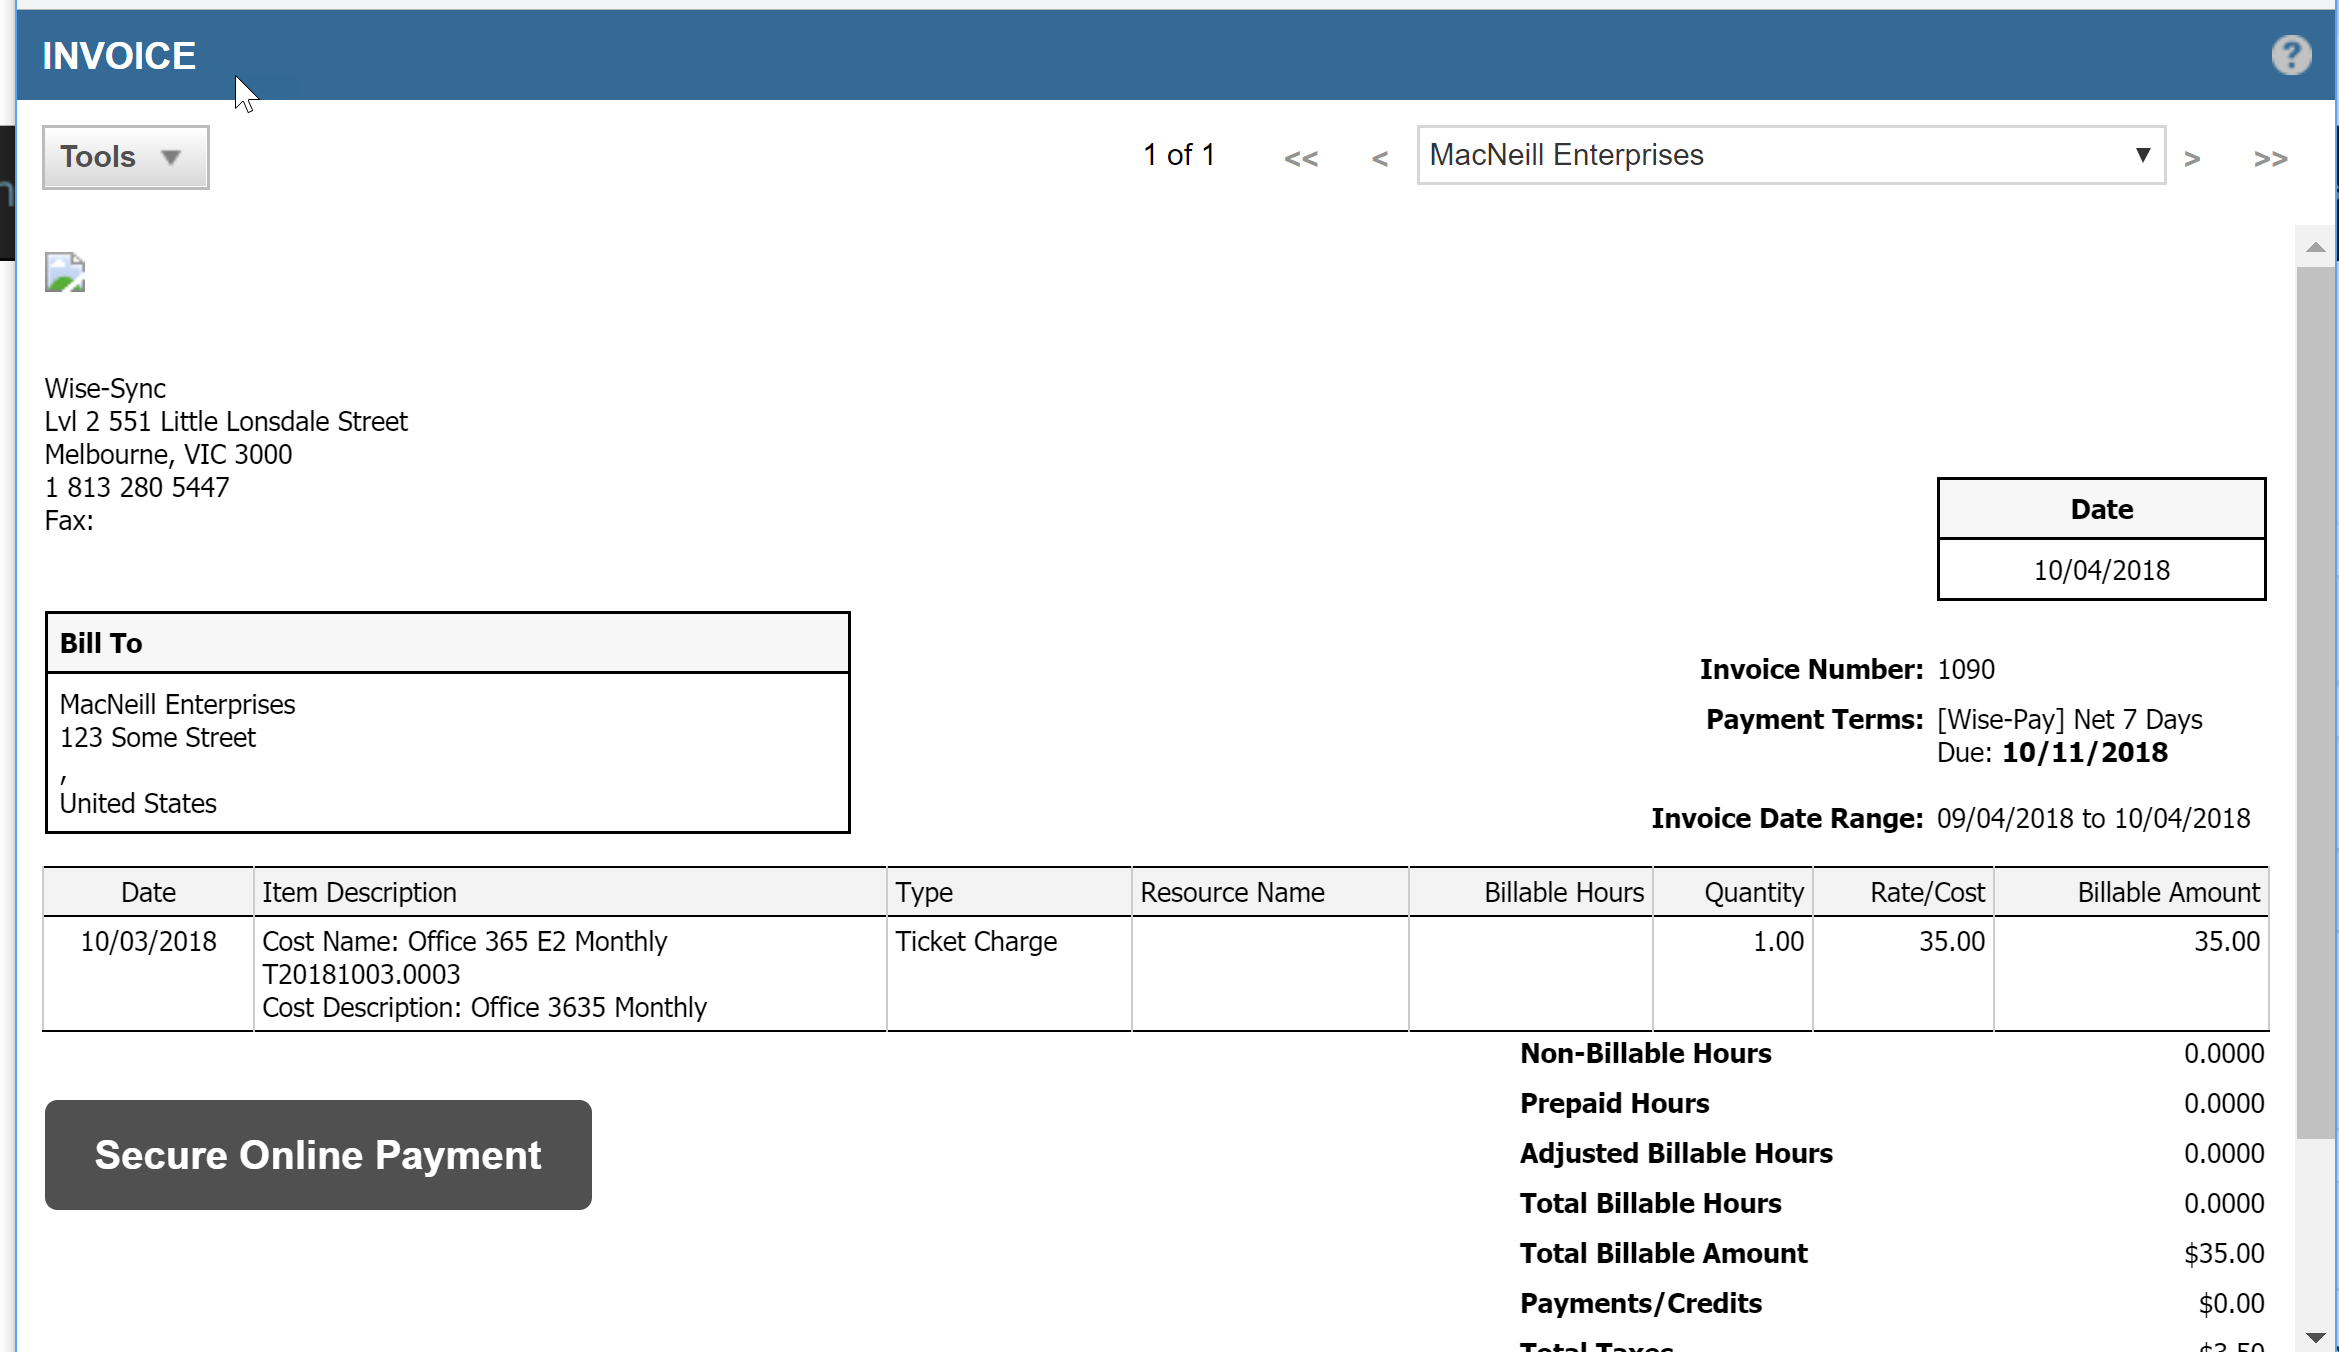
What's a PayNow Email Link?
Allow your customers to pay an invoice quickly via a Pay Now button from invoices you have emailed to them. We'll show you how to add a new Pay Now button to either ConnectWise Manage or Datto Autotask PSA.
How do I get there?
To configure your Email Links, click Configure from the top menu and select Merchants
What do I do?
This configuration is a two-step process:
- Generate the PayNow button from Wise-Pay interface
- Configure PSA invoice email with Email Links details
Generate the PayNow Button
Here's how to do it:
- Navigate to the Email Links tab.
- Choose whether you wish to add the Pay Now button to the email you send to customers, or the invoice itself, by setting the Email Link Type. Note: ConnectWise users will only see the Email type.
- Use Email Button options to format the button corners and text.
- Click Generate.
- Click Display and copy HTML to clipboard to paste into your Invoice/Email Template in your PSA.
Configure PSA invoice email with Email Links details
Insert the HTML into ConnectWise Invoice Template
Note: You will need to have ConnectWise Admin user rights to be configure Invoice Email Templates.
Here's how to do it:
- Locate Email Formats - Invoicing Setup Table
- Choose the Invoice Email Template you wish to add the PayNow button to
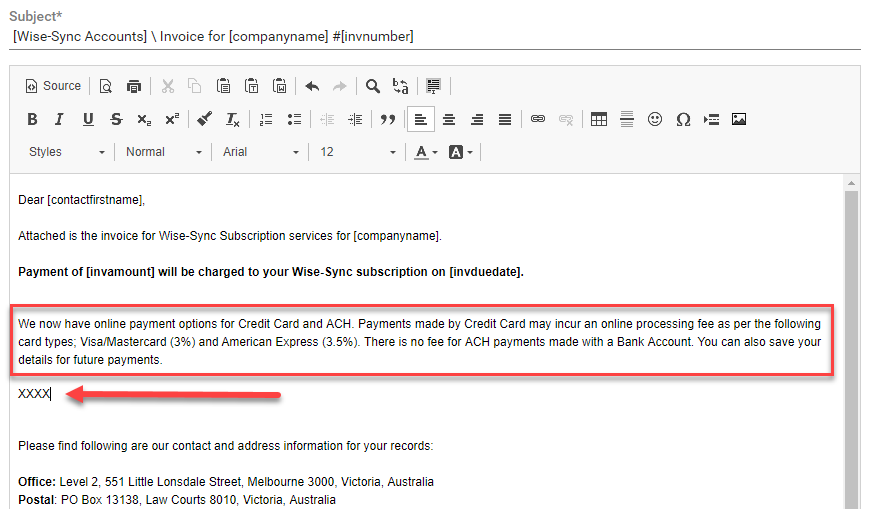
Tip: Enter xxxx in the position where you would like to place your button.
- Click on the Source button in the WYSIWYG editor
- Find (CTRL + F) your text "xxxx" entered into the viewer.

- Paste the HTML block of text in the position of the xxxx text entered.

Tip: You can change the button text to read what ever you feel is appropriate for the type of invoice being sent. You do not need to generate a new button to change this text, as it is merely a label for the button.
- Click Source button to return to the view.
- Click Save.


Navigate to Admin > Features and Settings > Finance, Accounting and Invoicing
Note:
Pay Now URLs generated by Wise-Pay use standard Datto Autotask PSA placeholders. If Datto Autotask PSA is using customised local terms, the Pay Now URL must be changed to match your current preferences before adding it to your invoice or email template. Read more about Datto Autotask PSA Local Terms & Symbols here. If you're having an issue with the variables in your Pay Now URL, read FAQ - How to edit Datto Autotask PSA Variables in a PayNow Email Link.
Here's how to do it:
- Under the Invoices heading, click Invoice Templates.

- Select the Invoice Template you wish to add the Pay Now button to

- Navigate to and click to edit the Bottom of Invoice section.

- In Design view, mark the location you wish to add the button with xxxxxxx.
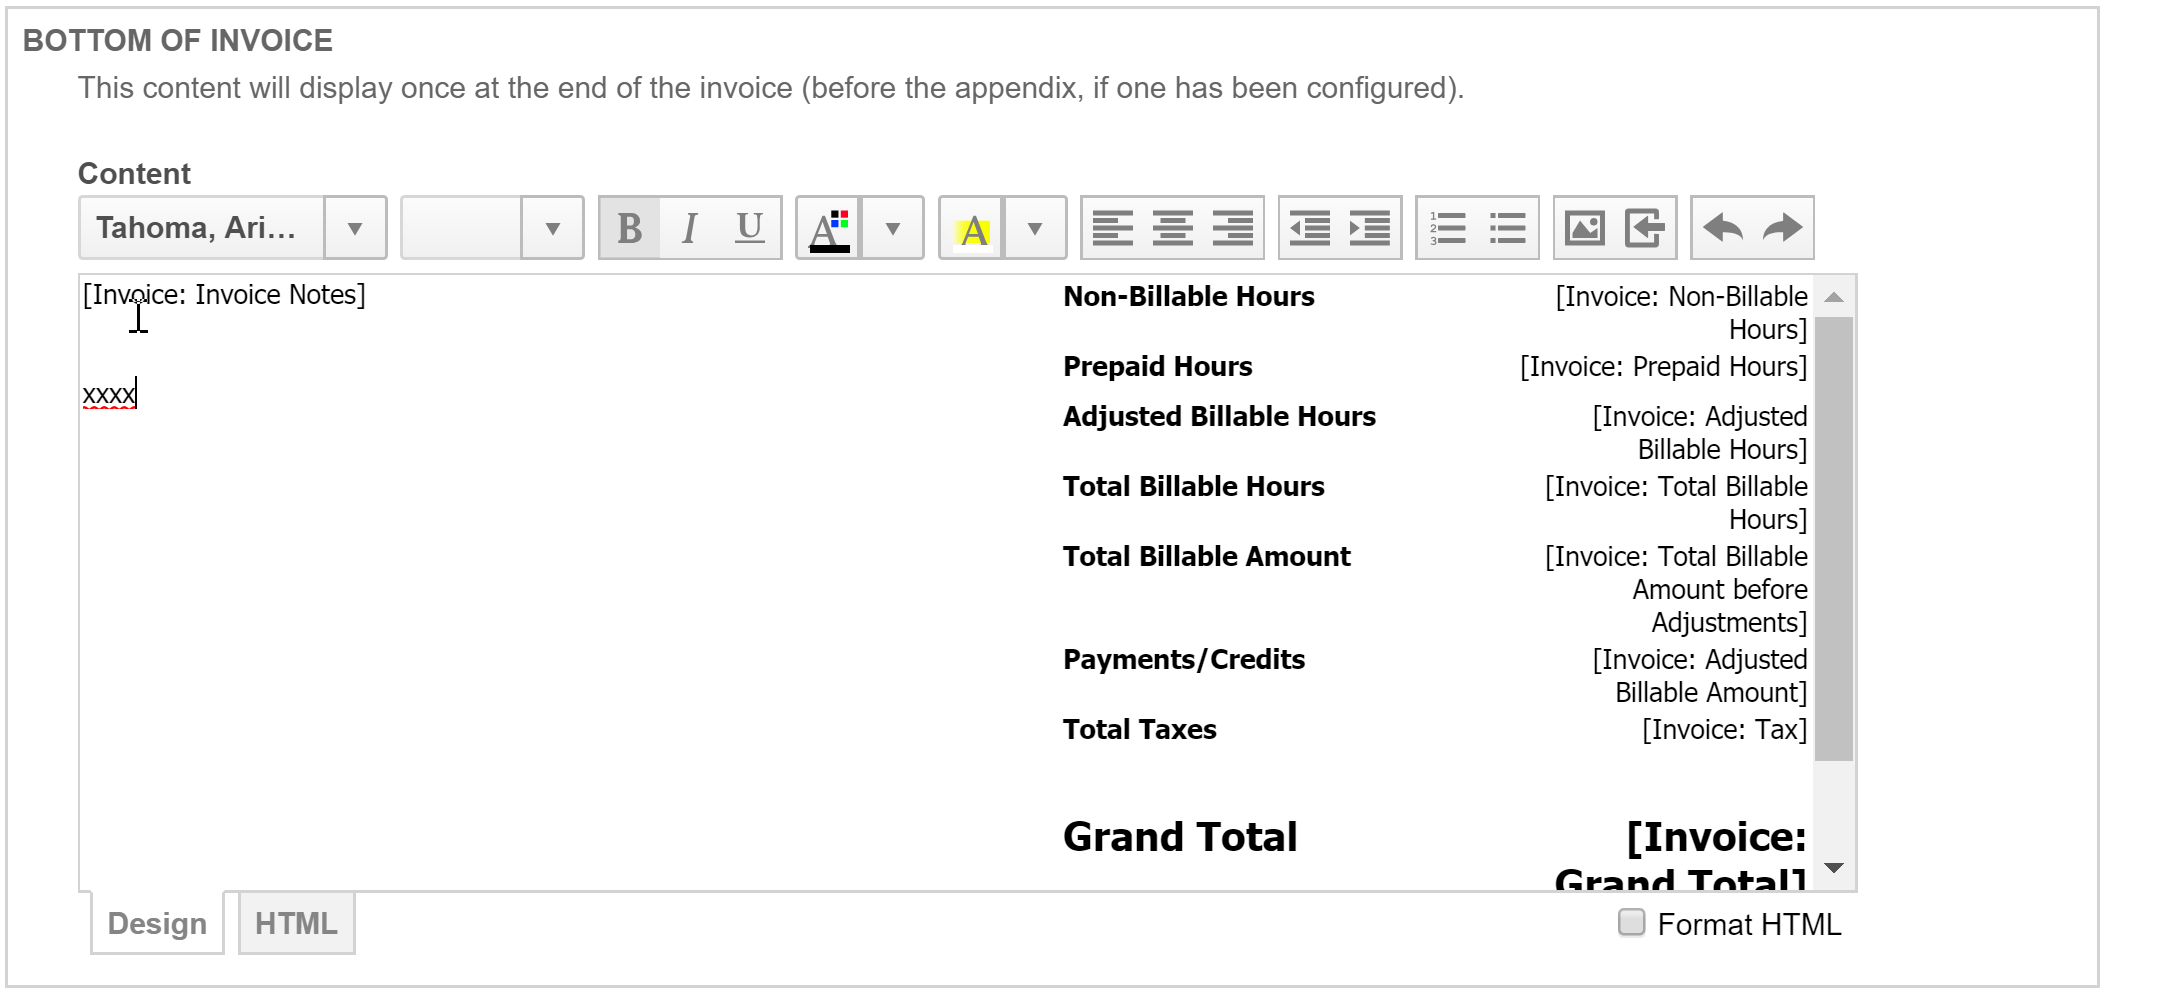
- Switch to HTML view and paste the HTML from Wise-Pay, replacingxxxxxhighlighted.

- Switch to Design view to preview the button.
- Save the template.
Note:
More information about Autotask Invoice Templates can be found here.
Navigate to Admin > Features and Settings > Finance, Accounting and Invoicing
Note:
Pay Now URLs generated by Wise-Pay use standard Datto Autotask PSA placeholders. If Datto Autotask PSA is using customised local terms, the Pay Now URL must be changed to match your current preferences before adding it to your invoice or email template. Read more about Datto Autotask PSA Local Terms & Symbols here. If you're having an issue with the variables in your Pay Now URL, read FAQ - How to edit Datto Autotask PSA Variables in a PayNow Email Link.
Here's how to do it:
- Under the Invoices heading, click Invoice Email Messages.
- Select the Invoice Email Message you wish to add the Pay Now button to.
- In Design view, mark the location you wish to add the button with xxxxxxx.
- Switch to HTML view and paste the HTML from Wise-Pay, replacingxxxxxhighlighted.

- Save the message.
Note:
More information about Autotask Invoice Email Messages can be found here.


Branding and Configuring the Payment Button
You can modify the color and wording for these buttons within the HTML provided.
Please note that there are two sections which should be updated within the HTML as one is for Outlook and the other for all other mail clients.
To change the color of this button, switch to source code, locate the two instances of background or fill color #505050, and replace with your companies preferred brand color (in hex).